How to Organize Kitchen Pantry: Step-by-Step Guide
A messy pantry slows down every meal. You reach for the pasta and find three open bags of rice. The tin you need is hiding behind a wall of jars, and something at the back went out of date months ago. It is a small problem, but it repeats itself every single day, and it quietly wastes food, money and patience.
The good news is that learning how to organize kitchen pantry space is not difficult, and it does not need expensive storage systems or a full weekend of work. What it needs is a clear order of steps: empty everything, clean properly, group similar items, store them in a sensible way, and keep the system going with a short routine. This guide walks you through each step in plain language, with ideas that work in a large walk-in pantry and in a single deep cupboard.
By the end, you will know exactly what you own, where it lives, and what needs using up first. Cooking becomes quicker, shopping lists become accurate, and far less food ends up in the bin.
Quick Takeaways
- Empty the pantry fully before you start, so you can see everything you own in one place.
- Throw away out-of-date food and group what is left into simple categories.
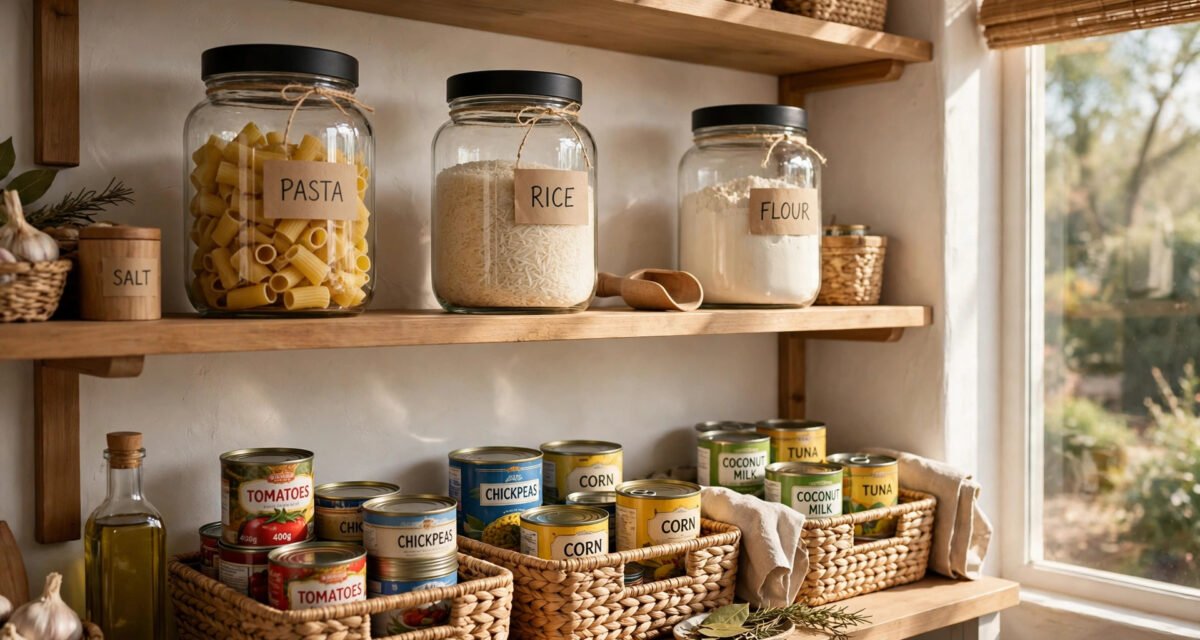
- Decant dry goods like flour, rice and pasta into clear jars so you can see levels at a glance.
- Label every jar and shelf area, including the date you opened or filled it.
- Build zones around how you cook, keeping daily items at eye level and heavy items low down.
- Use first in, first out rotation so older food gets used before newer food.
- Give the pantry a five-minute tidy each week to stop clutter creeping back.
Step 1: Empty the Pantry Completely
Start by taking everything out. Every jar, tin, packet, bottle and half-used bag of flour needs to come off the shelves and onto your worktop or kitchen table. This feels like a big job, but it is the step that makes all the others work. You cannot organize kitchen pantry shelves properly while items are still hiding in corners, and a full clear-out shows you the true size of the task.
As you empty, work shelf by shelf so the job stays manageable. Put items into rough piles as they come out: tins together, jars together, packets together. Check dates as you go. Anything well past its use-by date should go straight into a bin bag, along with stale crackers, soft cereal and spices that lost their smell a long time ago. If an item is unopened and in date but you know your family will never eat it, set it aside for a food bank donation box.
This stage often surprises people. You may find three jars of the same spice, four tins of chopped tomatoes, or a sauce you bought for a recipe you cooked once, two years ago. Write these duplicates down, because the list will stop you buying more of the same thing on your next shop. An honest picture of what you already own is the real starting point of an organised pantry.
Step 2: Clean Every Shelf Properly
With the shelves bare, clean them before anything goes back. Crumbs, sticky rings from honey jars and fine dustings of flour build up over time, and putting clean jars back onto dirty shelves undoes half your work. Use warm water with a little washing-up liquid and a cloth, and wipe every shelf, the shelf edges and the inside of the door if your pantry has one.
Check for signs of pantry pests while you clean. Tiny moths, webbing in corners or small holes in packets can point to stored food pests, which are common in flour and grain products. If you spot any, throw away affected items, clean thoroughly, and consider storing flour and grains in sealed jars from now on, which keeps pests out far better than paper bags.
Let the shelves dry fully before you restock. If you use shelf liner, now is the moment to replace worn pieces or wash reusable ones. A clean, dry, empty pantry is a blank page, and the next steps decide how that page gets organised.

Step 3: Sort and Group by Category
Now group what is left into categories that match the way your household actually cooks and eats. Categories keep similar items together, so you always know where to look. Most homes find that a simple set of groups covers nearly everything in the pantry.
- Baking: flour, sugar, baking powder, cocoa, icing sugar and decorations.
- Cooking basics: rice, pasta, lentils, couscous and grains.
- Tins and jars: chopped tomatoes, beans, soup, tuna and sauces.
- Breakfast: cereal, oats, spreads and honey.
- Snacks: crisps, biscuits, nuts and cereal bars.
- Herbs and spices: everyday spices, stock cubes and seasoning mixes.
- Drinks: tea, coffee, squash and hot chocolate.
Keep the categories broad. Too many tiny groups create confusion, and nobody in the house will remember which of nine zones holds the gravy granules. Five to eight groups suit most kitchens. If children help themselves to snacks, give snacks their own clear group at a height they can reach safely, and keep cleaning products and alcohol well away from food groups, ideally in a completely separate cupboard.
While you group, think about quantities. If your baking pile is huge and your tins pile is small, your shelf space should reflect that. Categories are not just labels; they tell you how much room each type of food genuinely needs.
Step 4: Decant Dry Goods into Jars and Containers
Half-open bags of flour and rice are the biggest cause of pantry mess. They spill, they tear, and you can never tell how much is left. Decanting means moving dry goods into jars or airtight containers, and it is one of the most effective steps when you organize kitchen pantry storage.
Clear glass or plastic jars work best for everyday items, because you can see the contents and the level at a glance. Choose containers that are easy to open with one hand, wide enough for a scoop, and shaped to sit neatly side by side. Square containers use shelf space better than round ones, since they leave no wasted gaps between them.
You do not need matching designer sets. A mix of reused jam jars, sturdy plastic tubs and a few larger canisters works perfectly well, and it costs very little. What matters is the seal. A proper airtight lid keeps flour fresh, stops spills, and protects food from moisture and pests. Keep the original packet instructions if you need cooking times, and tape them to the jar or write the key details on the label, which is covered in the next step.
Not everything needs decanting. Items you use rarely, or foods that come in sturdy tins and bottles, can stay in their original packaging. Focus your jars on the high-use, messy items: flour, sugar, rice, pasta, oats, lentils and cereals.
Step 5: Label Everything Clearly
Labels turn a tidy pantry into a working system. White rice and plain flour look almost identical in jars, and nobody should have to open and sniff three containers to find the self-raising flour. A simple label on the front of each jar, with the contents written clearly, removes all the guesswork.
Add the date as well as the name. Write the use-by date from the original packet, or the date you opened or filled the jar, on the label or on a small sticker on the base. This one habit supports the rotation system explained later and stops old food quietly ageing at the back of a shelf.
You can use a label maker, handwritten stickers, chalk pens on glass, or simple masking tape and a marker. Tape and a marker are cheap, easy to replace, and honest. Whatever you choose, keep the style consistent, write in plain words everyone in the house understands, and face every label forwards when you put jars back.
Step 6: Create Zones That Match How You Cook
With categories ready and jars labelled, arrange the pantry in zones. A zone is simply a shelf area given to one category. The golden rule is to place items according to how often you use them and how heavy they are.
Keep daily items at eye level and within easy reach: tea, coffee, cereal, pasta, rice and the tins you reach for several times a week. Put heavy items, such as large bags of flour, bulk tins and drinks, on lower shelves, where they are safe to lift and cannot fall on anyone. Light, rarely used items, like party supplies or seasonal baking items, can go on the highest shelf.
If your pantry is a deep cupboard, avoid pushing small items to the very back where they vanish. Use a shallow basket or tray for small packets, so you can pull the whole tray out like a drawer and see everything at once. Turntables help in corner cupboards, and stepped shelf risers lift back rows of tins so their labels stay visible. These simple tools are the workhorses of good pantry organisation, and they cost far less than a full refit.
Leave a little breathing room in each zone. Shelves packed edge to edge look full for a day and chaotic within a week, because there is nowhere for a new item to go. A small gap in each zone is space for the weekly shop.

Step 7: Use First In, First Out Rotation
Shops rotate stock so the oldest products sell first, and the same idea works at home. First in, first out means new items go to the back of the zone and older items stay at the front, ready to be used. It takes ten seconds when you unpack shopping, and it stops the classic problem of a three-year-old tin hiding at the back of the cupboard.
Rotation matters most for tins, jars, sauces and packets with long dates, because these are the items that drift backwards and get forgotten. When you buy a new tin of beans, place it behind the tins already there. When you refill a jar, try to use up the last of the old contents first, or tip the remainder into a small bowl to use that day rather than burying it under a fresh bag.
Once a month, scan the front of each zone and pull anything close to its date into a “use soon” spot, such as a small basket by itself. Plan a meal or two around that basket each week. It cuts waste, saves money, and keeps your dates honest without any complicated system.
Small Pantry Ideas That Make a Big Difference
A small pantry or a single cupboard simply needs smarter use of space rather than more space. Start with the door. Slim racks fitted inside a cupboard door hold spices, wraps and small packets that otherwise get lost on shelves. Hooks or a rail under a shelf can hold cups or utensils if your pantry doubles as general kitchen storage.
Stacking is your friend in a small space. Use stackable containers for dry goods, a two-tier shelf insert for tins, and baskets that group small loose items like stock cubes, sauce sachets and gravy packets. One basket for “small things” stops a dozen little packets spreading across every shelf.
Be strict about what earns a place. Small pantries cannot store bulk buys of everything. Keep one in use and one spare for your key items, and let the supermarket store the rest until you need it. A small, honest stock that turns over quickly will always beat a crammed cupboard full of forgotten food.
A Simple Maintenance Routine That Keeps It Tidy
An organised pantry stays organised through small habits, not big efforts. The routine below takes only a few minutes and protects the work you have just done.
- When you unpack shopping: put new items at the back of each zone, decant anything that needs a jar, and update labels and dates.
- Once a week (five minutes): straighten jars so labels face forward, check the use-soon basket, and note anything running low on your shopping list.
- Once a month (fifteen minutes): wipe the main shelves, check dates across all zones, and clear out anything stale or unwanted.
- Twice a year: repeat the full empty and clean from steps one and two, and rethink any zone that no longer matches how you cook.
Get the whole household on board. A system only works if everyone puts things back in the right zone, so show family members where things live and explain the front-to-back rule. Children usually enjoy being in charge of one small job, such as keeping the snack basket tidy or checking that lids are on properly.
Frequently Asked Questions
How long does it take to organize a kitchen pantry?
For an average cupboard pantry, allow one to two hours to empty, clean, sort and restock properly. A large walk-in pantry may take half a day. The weekly five-minute tidy then keeps it in shape, so the big job only needs repeating about twice a year.
What should I store pantry food in?
Airtight glass or plastic jars suit dry goods like flour, rice, pasta and oats, because they keep food fresh and let you see levels. Tins, bottles and sturdy packets can stay in their original packaging. Whatever you use, make sure lids seal well and containers fit your shelves.
How do I organize a very small pantry?
Use door racks for spices and small items, stackable jars, shelf inserts for tins, and one basket for small packets. Keep only one spare of each staple, and be strict about what earns a place. Zones still work in a small space; they are simply shelf sections rather than whole shelves.
How do I stop my pantry getting messy again?
Follow the first in, first out rule when you unpack shopping, keep labels facing forward, and do a five-minute tidy once a week. Most mess comes from new items being pushed in anywhere, so putting things back in their zone straight away is the habit that protects the whole system.
What should never be stored in a pantry?
Keep cleaning chemicals, pet food with a strong smell, and medicines away from food storage, ideally in a separate cupboard. Also avoid storing fresh fruit and vegetables that spoil quickly, onions near potatoes, or anything damp. A pantry works best for dry, sealed and shelf-stable foods.
Conclusion
Knowing how to organize kitchen pantry space comes down to seven simple steps: empty it, clean it, group by category, decant the messy dry goods, label everything, build zones around how you cook, and rotate stock so the oldest food gets used first. None of these steps need special equipment or a big budget. Most kitchens already own enough jars, baskets and tubs to make the system work today.
The real reward is not a photograph-worthy shelf, although a tidy pantry does look good. It is the daily ease of knowing what you have, finding it in seconds, and wasting less of it. Start with one shelf if the whole job feels too big, follow the steps in order, and let the five-minute weekly tidy carry the system from there. Your future self, standing in front of a calm and orderly pantry at dinner time, will be glad you did.
Share Your Pantry Tips
Every kitchen runs a little differently, and the best ideas often come from other home cooks. What is the one change that made the biggest difference in your pantry: labelled jars, a door rack, the use-soon basket, or something else entirely? Share your tip in the comments, pass this guide on to a friend whose cupboards need a reset, and tell us which zone you plan to sort first.

magazinesupdate
Sharing practical guides, news and insights on Magazines Update.